Showing posts with label styling. Show all posts

Wednesday, 3 July 2013

Harriet Lodge Shoot, Editing Process

Hello all!

I've had a brilliant day working with Gemma Rowland and Harriet Lodge creating some really high fashion, sharp images. Gemma is excellent at what she does, her make up skills are insane - masses of talent there. And Harriet needed next to no direction at all, she was a total pro and has helped me produce a great set of photos. Thank you to both, such babes!


I'm right in the middle of editing Harriet's images and thought I'd introduce you to the most basic kind of editing I do. After I've filtered through the whole set and I've chosen my final images I stick them all in a separate folder and start editing. Before opening them up in photoshop or GIMP I adjust the shadows, contrast and brightness. This is something literally anyone could do for any kind of photo. It takes about 10 seconds and can instantly improve an image. 


^ Here's the original image, SOC. (Straight Out the Camera)

All the adjustments I need come as default editing tools on my laptop, if you don't have this on yours never fear! Shadows, brightness etc. will come with any basic editing program so I recommend downloading Picassa (or any other free, easy to use photo processing software) or a using an online editing site to help you out.


And here's the image after. Even though it's only a subtle alteration, its made a big difference to the image and has enhanced Harriet's eyes and hair with little-to-no effort at all.

So if you're not keen on altering your photo's too much, or just can't be bothered to go through the whole photoshop process (I wouldn't blame you, it eats up half your life) then these tiny adjustments can bring a bit of life to an image that had bland tones and no eye catching features. 

More on this shoot later,

Rach x

Tuesday, 2 July 2013

Sidmouth Beach Shoot with Katerina Tsepeinikova

Last week I photographed Russian beauty Katerina with friend and stylist Molly Bridger.


With shoots like this one, lighting is everything. I work much better when its overcast and cloudy so I don't have to deal with harsh sun light that can bleach out photos if your settings aren't altered.

Here's one of my edits that works as a good example of what f/stop/ISO/shutter speed you should be looking at in a shoot similar to this one.


F/stop - 5
Exposure - 1/500 sec.
ISO - 125
Focal Length - 50mm

This shot is maybe slightly too light but with the right adjustments the exposure can work.


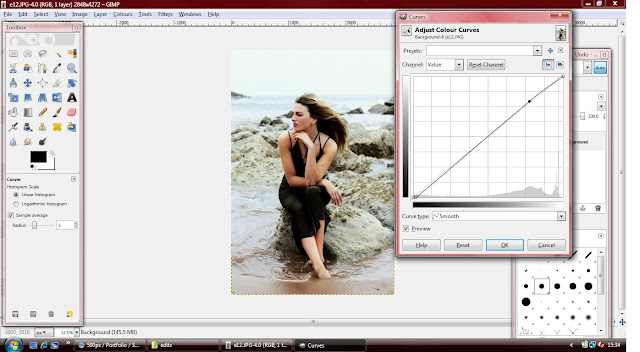
This was a summer shoot with a moody twist so bringing out the blues and cyan tones was important, especially in this images where there are no dominant colors and only dark/light shading. I also added a hint of green on the rocks and dress which helps merge all the colors together.

Then there's adjusting the shadows and making the dark areas darker and light areas lighter.

Here is where the 'Curves' setting on Photoshop/GIMP is your best friend.


You can find curves in either 'Adjustments' or by right clicking then going to Colors > curves. It's really just a matter of experimenting until your happy with how your photo looks.

The final touches include smoothing over blemishes with a combination of the smudge tool and paintbrush tool, then burning in areas (eyes, eyebrows, hair line, etc.) that should be darker using the Dodge/Burn tool.

That's a very basic low down on what goes into an image. This shot didn't take much work before I was happy with it, other images can be a bit more tricky. Tomorrow I'll post more on adjusting hair color and posing/back drops. 


Rach